In-World Devices: Difference between revisions
| (29 intermediate revisions by 2 users not shown) | |||
| Line 13: | Line 13: | ||
=Blood Well= | =Blood Well= | ||
[[File: | [[File:Blood Well 2026-01-13.png|left|thumb|Blood Well]] | ||
The Blood Well has multiple uses. You can deposit blood, withdraw blood, or transfer blood to another player. To use the Blood Well, it costs 5 Lindens to deposit, withdraw, or transfer. | The Blood Well has multiple uses. You can deposit blood, withdraw blood, or transfer blood to another player. To use the Blood Well, it costs 5 Lindens to deposit, withdraw, or transfer. | ||
| Line 51: | Line 51: | ||
=Reawakening Shrine= | =Reawakening Shrine= | ||
[[File:ReawakeningShrine400x400.png|left|thumb|Reawakening Shrine]] | [[File:ReawakeningShrine400x400.png|left|thumb|Reawakening Shrine]] | ||
The Reawakening Shrine is an animated device that revives a player. To operate the Reawakening Shrine, two players are required. The player who needs to be revived sits on the device first, followed by the player who will perform the revival. Two essences will be taken from the reviving player. The revived player will be restored with 1 | The Reawakening Shrine is an animated device that revives a player. To operate the Reawakening Shrine, two players are required. The player who needs to be revived sits on the device first, followed by the player who will perform the revival. Two essences will be taken from the reviving player. The revived player will be restored with 1.000 liters of blood. | ||
| Line 60: | Line 60: | ||
=Elixirs= | |||
= Elixirs = | |||
<gallery> | <gallery> | ||
File:RevivalElixir400x400.png|Revival Elixir | File:RevivalElixir400x400.png|Revival Elixir (Red) | ||
File:BreathOfVitality400x400.png|Breath of Vitality Elixir | File:BreathOfVitality400x400.png|Breath of Vitality Elixir (Teal) | ||
</gallery> | </gallery> | ||
Elixirs are consumable items used to restore or revive your avatar in ''Descendants of Darkness''. These interact with the '''human feeding system''', not other players. | |||
== Types of Elixirs == | |||
; Revival Elixir (Red) | |||
: Used to fully revive your avatar after death. | |||
; Breath of Vitality Elixir (Teal) | |||
: Used to restore humans that have been drained by feeding (when their blood has been taken). | |||
== Cost == | |||
Each elixir costs '''250 Linden Dollars (L$)'''. | |||
They can be purchased at the '''Descendants of Darkness main land'''. | |||
== How to Use == | |||
# Purchase the elixir: | |||
#* Right-click the elixir vendor | |||
#* Select '''Pay''' and enter '''L$250''' | |||
# Take the item: | |||
#* Right-click the elixir | |||
#* Select '''Take''' to move it into your inventory | |||
# Use the elixir: | |||
#* Attach it to your avatar | |||
#* Click the elixir in your hand | |||
#* Select '''Open Bottle''' | |||
#* Confirm by selecting '''Yes''' | |||
Once consumed, your avatar will be restored to '''full health'''. | |||
== Using Elixirs on Humans == | |||
Elixirs can also be used on humans. | |||
* Once purchased, you can send the elixir to a human | |||
* The human must attach the item | |||
* They then use it the same way by opening and drinking the elixir | |||
This allows you to restore humans that have been killed by feeding. | |||
=Essence Chest= | =Essence Chest= | ||
[[File:EssenceChest400x400.png|left|thumb]] | [[File:EssenceChest400x400.png|left|thumb]] | ||
The Essence Chest serves as a secure repository for your essence. Upon your demise, your essence would otherwise be lost, making it advisable to store it within the chest to prevent any loss. With the Essence Chest, you have the capability to deposit and withdraw essence at will. Moreover, you retain control over who can access your stored essence, with options to limit access to yourself, a select group, or open it to everyone. Additionally, you can track all transactions made with your essence through the transaction history feature. This provides transparency regarding who has withdrawn essence from your Chest. Finally, you have the ability to customize the appearance of your Essence Chest by selecting from various texture colors, including Gold, Blue, and Black. | The Essence Chest serves as a secure repository for your essence. Upon your demise, your essence would otherwise be lost, making it advisable to store it within the chest to prevent any loss. With the Essence Chest, you have the capability to deposit and withdraw essence at will. Moreover, you retain control over who can access your stored essence, with options to limit access to yourself, a select group, or open it to everyone. Additionally, you can track all transactions made with your essence through the transaction history feature. This provides transparency regarding who has withdrawn essence from your Chest. Finally, you have the ability to customize the appearance of your Essence Chest by selecting from various texture colors, including Gold, Blue, and Black. | ||
=Overseer= | |||
[[File:Oversee.png|left|thumb]] | |||
= The Overseer Guide = | |||
The '''Overseer''' is a monitoring device that allows you to track yourself or another player. It can alert you when the monitored player is attacked, nearing starvation, or needs help while offline. | |||
If the tracked player is attacked, the Overseer will send a notification in '''Nearby Chat''' and, if configured, to '''Discord''' through a webhook. | |||
---- | |||
---- | |||
== How Alerts Work == | |||
The server checks for attacks every '''15 minutes on the hour'''. If an attack has occurred, the Overseer will send an alert within that 15-minute window. | |||
Alerts may include: | |||
* Attack notifications | |||
* Near starvation warnings | |||
* Discord webhook notifications, if added | |||
---- | |||
== What the Overseer Can Do == | |||
With the Overseer, you can: | |||
* Monitor yourself or another player | |||
* Receive attack alerts | |||
* View attack logs for up to '''3 days''' | |||
* View death logs | |||
* View kill logs | |||
* Remotely donate blood to an offline player | |||
* Add Discord webhook alerts | |||
* Remove the tracked player and add a new one | |||
---- | |||
== How to Use the Overseer == | |||
# Rez the Overseer. | |||
# Touch the Overseer to open the menu. | |||
# Add yourself, or have the player you want to monitor touch it. | |||
# Both players must be alive when adding a player. | |||
# The tracked player may be resting, but they cannot be dead. | |||
The Overseer hover text will change color depending on the tracked player’s health: | |||
{| class="wikitable" | |||
!Hover Text Color | |||
!Meaning | |||
|- | |||
|Green | |||
|Healthy | |||
|- | |||
|Yellow | |||
|Warning | |||
|- | |||
|Red | |||
|Danger | |||
|} | |||
<blockquote>'''Note:''' If the tracked player is dead, the menu options will not be available. The only available option will be to remove the player.</blockquote> | |||
---- | |||
= Overseer Menu Options = | |||
# Donate Blood | |||
# View Attack Logs | |||
# View Kill Logs | |||
# View Death Logs | |||
# Turn Off Attack Alert | |||
# Turn Off Near Starvation Alert | |||
# Set Starvation Alert | |||
# Remove Player from Overseer | |||
# Add Discord Webhook | |||
---- | |||
== 1. Donate Blood == | |||
The '''Donate Blood''' option allows you to remotely feed the tracked player. | |||
To donate blood: | |||
* The tracked player must have been offline for at least '''4 hours'''. | |||
* You must accept the debit permissions popup. | |||
* The cost is '''L$50 per 0.500 liters'''. | |||
* Donations increase in '''0.500 liter increments'''. | |||
This is useful when a player cannot log in to feed themselves.<blockquote>'''Important:''' Debit permissions allow the Overseer to charge your account for the blood donation.</blockquote> | |||
---- | |||
== 2. View Attack Logs == | |||
The '''View Attack Logs''' option lets you review attacks against the tracked player. | |||
You can view logs for: | |||
* Today | |||
* Yesterday | |||
* The day before yesterday | |||
=== Example Attack Log === | |||
<code>╔═⊱⋅•∙•⋅⋅•⋅⋅•⋅⊱⋅⋅•⋅⋅•∙⋅∘☽★☾∘⋅∙•⋅⋅•⋅⋅⊰⋅•⋅⋅•⋅⋅•⋅⋅∙•⋅⊰ | |||
║ Date: Jun 11, 2026 10:56:35 AM | |||
║ Attacker: Oreo Cream Rуσʂհℹη (oreocream.baby) | |||
║ Victim: Eva Rуσʂհℹη (evakora) | |||
║ Damage done: 0.000 | |||
║ Victim's Health: 4.700 | |||
║ Location: Uphill | |||
║ Teleport to Uphill (128,128,25) | |||
║ Page 2 of 2 of attack logs. | |||
╚═⊱⋅•∙•⋅⋅•⋅⋅•⋅⊱⋅⋅•⋅⋅•∙⋅∘☽★☾∘⋅∙•⋅⋅•⋅⋅⊰⋅•⋅⋅•⋅⋅•⋅⋅∙•⋅⊰</code> | |||
---- | |||
== Log Paging System == | |||
Attack logs, kill logs, and death logs all use a paging system. | |||
Each page can display up to '''4 logs'''. The Overseer can print up to '''4 pages''' at a time. Once those pages are printed, you may be asked if you want to view more. | |||
If you click '''More''', the Overseer will print older pages. | |||
Think of the logs like a book: | |||
* The newest logs are on the highest page numbers. | |||
* When the logs print in Nearby Chat, the newest entries appear at the top. | |||
* Older entries continue below as more pages are printed. | |||
---- | |||
== 3. View Kill Logs == | |||
The '''View Kill Logs''' option shows every recorded time the tracked player has killed another player. | |||
Kill logs may include: | |||
* Date and time | |||
* Victim name | |||
* Killer name | |||
* Location | |||
* Teleport location | |||
* Total kill count | |||
=== Example Kill Log === | |||
<code>╔═⊱⋅•∙•⋅⋅•⋅⋅•⋅⊱⋅⋅•⋅⋅•∙⋅∘☽★☾∘⋅∙•⋅⋅•⋅⋅⊰⋅•⋅⋅•⋅⋅•⋅⋅∙•⋅⊰ | |||
║ Date: Apr 21, 2026 08:12:35 PM | |||
║ Victim: Ninjie | |||
║ Killed by Eva Rуσʂհℹη (evakora) | |||
║ Location: Social Island 10 | |||
║ Teleport to Social Island 10 (128,128,25) | |||
║ Page 1 of 2 of kill logs. | |||
╚═⊱⋅•∙•⋅⋅•⋅⋅•⋅⊱⋅⋅•⋅⋅•∙⋅∘☽★☾∘⋅∙•⋅⋅•⋅⋅⊰⋅•⋅⋅•⋅⋅•⋅⋅∙•⊰</code> | |||
=== Example Total Kills Message === | |||
<code>╔═⊱⋅•∙•⋅⋅•⋅⋅•⋅⊱⋅⋅•⋅⋅•∙⋅∘☽★☾∘⋅∙•⋅⋅•⋅⋅⊰⋅•⋅⋅•⋅⋅•⋅⋅∙•⋅⊰ | |||
║ Eva Rуσʂհℹη (evakora) has a total of 5 kills. | |||
╚═⊱⋅•∙•⋅⋅•⋅⋅•⋅⊱⋅⋅•⋅⋅•∙⋅∘☽★☾∘⋅∙•⋅⋅•⋅⋅⊰⋅•⋅⋅•⋅⋅•⋅⋅∙•⋅⊰</code> | |||
---- | |||
== 4. View Death Logs == | |||
The '''View Death Logs''' option shows recorded deaths for the tracked player. | |||
Death logs may include: | |||
* Date and time | |||
* Victim name | |||
* Killer or cause of death | |||
* Location | |||
* Teleport location | |||
* Total death count | |||
=== Example Death Log === | |||
<code>╔═⊱⋅•∙•⋅⋅•⋅⋅•⋅⊱⋅⋅•⋅⋅•∙⋅∘☽★☾∘⋅∙•⋅⋅•⋅⋅⊰⋅•⋅⋅•⋅⋅•⋅⋅∙•⋅⊰ | |||
║ Date: Apr 1, 2025 12:59:31 AM | |||
║ Victim: Eva Rуσʂհℹη (evakora) | |||
║ Killed by Kou Ayashi | |||
║ Location: Kealani | |||
║ Teleport to Kealani (128,128,25) | |||
║ Page 3 of 4 of death logs. | |||
╚═⊱⋅•∙•⋅⋅•⋅⋅•⋅⊱⋅⋅•⋅⋅•∙⋅∘☽★☾∘⋅∙•⋅⋅•⋅⋅⊰⋅•⋅⋅•⋅⋅•⋅⋅∙•⋅⊰</code> | |||
=== Example Total Deaths Message === | |||
<code>╔═⊱⋅•∙•⋅⋅•⋅⋅•⋅⊱⋅⋅•⋅⋅•∙⋅∘☽★☾∘⋅∙•⋅⋅•⋅⋅⊰⋅•⋅⋅•⋅⋅•⋅⋅∙•⋅⊰ | |||
║ Eva Rуσʂհℹη (evakora) has died 13 times. | |||
╚═⊱⋅•∙•⋅⋅•⋅⋅•⋅⊱⋅⋅•⋅⋅•∙⋅∘☽★☾∘⋅∙•⋅⋅•⋅⋅⊰⋅•⋅⋅•⋅⋅•⋅⋅∙•⋅⊰</code> | |||
---- | |||
== 5. Turn Off Attack Alert == | |||
This option turns off attack alerts for the tracked player. | |||
When attack alerts are turned off: | |||
* You will no longer receive Nearby Chat attack messages. | |||
* Discord webhook attack alerts will also stop. | |||
---- | |||
== 6. Turn Off Near Starvation Alert == | |||
This option turns off near starvation alerts. | |||
When this is turned off, you will not receive a Nearby Chat message when the tracked player is close to dying from lack of feeding. | |||
---- | |||
== 7. Set Starvation Alert == | |||
The '''Set Starvation Alert''' option allows you to choose when you want to be warned before the tracked player dies from lack of feeding. | |||
You can choose to be alerted: | |||
* 1 day before death | |||
* 2 days before death | |||
* 3 days before death | |||
For example, if you select '''1 day''', you will receive a notification in Nearby Chat and Discord when the player is within one day of dying from starvation. | |||
If the alert is set to '''1 day''' and you receive the warning, the player will die at '''midnight''' if they are not fed. | |||
---- | |||
== 8. Remove Player from Overseer == | |||
This option removes the currently tracked player from the Overseer. | |||
After removing a player: | |||
* You will no longer receive notifications about them. | |||
* You may add a new player to the Overseer. | |||
---- | |||
== 9. Add Discord Webhook == | |||
This option allows you to add a Discord Webhook URL to the Overseer. | |||
Once added, the Overseer can send alerts to your chosen Discord channel when: | |||
* The tracked player is attacked | |||
* The tracked player is near death from starvation | |||
<blockquote>'''Warning:''' Keep your Discord Webhook URL private. Anyone with the URL may be able to send messages to that Discord channel.</blockquote> | |||
---- | |||
= How to Add a Discord Webhook to the Overseer = | |||
== Step 1: Create a Discord Webhook == | |||
# Open Discord. | |||
# Go to the server where you want Overseer alerts to appear. | |||
# Click the server name in the top left. | |||
# Select '''Server Settings'''. | |||
# Click '''Integrations''' in the sidebar. | |||
# Under '''Webhooks''', click '''Create Webhook'''. | |||
# Choose the channel where alerts should be sent. | |||
# Customize the webhook name and avatar if desired. | |||
# Click '''Copy Webhook URL'''. | |||
---- | |||
== Step 2: Add the Webhook URL to the Overseer == | |||
# Touch the Overseer to open the menu. | |||
# Select '''Add Discord Webhook'''. | |||
# Paste the Discord Webhook URL. | |||
# Confirm the change to save it. | |||
---- | |||
== Step 3: Test the Webhook == | |||
After adding the webhook, test it to make sure alerts are working. | |||
You can test by: | |||
* Simulating an attack on the tracked player | |||
* Checking the selected Discord channel for the alert message | |||
If the alert appears in Discord, the webhook is working correctly. | |||
---- | |||
= Quick Reference = | |||
{| class="wikitable" | |||
!Option | |||
!What It Does | |||
|- | |||
|Donate Blood | |||
|Feeds an offline player using paid blood donation | |||
|- | |||
|View Attack Logs | |||
|Shows recent attacks against the tracked player | |||
|- | |||
|View Kill Logs | |||
|Shows kills made by the tracked player | |||
|- | |||
|View Death Logs | |||
|Shows deaths and causes of death | |||
|- | |||
|Turn Off Attack Alert | |||
|Stops attack alerts in Nearby Chat and Discord | |||
|- | |||
|Turn Off Near Starvation Alert | |||
|Stops starvation warning alerts | |||
|- | |||
|Set Starvation Alert | |||
|Sets a warning for 1, 2, or 3 days before starvation death | |||
|- | |||
|Remove Player from Overseer | |||
|Removes the tracked player | |||
|- | |||
|Add Discord Webhook | |||
|Sends Overseer alerts to Discord | |||
|} | |||
=Trial of Shadows= | |||
{{:Trial of Shadows}} | |||
Latest revision as of 22:22, 12 June 2026
Resting Nexus

The Resting Nexus offers protection from blood loss for a specified duration, currently set at 14 days. You have the choice to age during this period or remain unchanged. Opting for 14 days without aging incurs a fee of 250 Lindens, while choosing aging costs 500 Lindens. Aging occurs gradually, with one night passing for every two days, ensuring a balanced progression. This duration was chosen to maintain fairness, preventing abuse by creating alternate accounts solely for aging. The Resting Nexus provides security during periods of absence from the computer, yet players remain vulnerable to attacks.
Blood Well

The Blood Well has multiple uses. You can deposit blood, withdraw blood, or transfer blood to another player. To use the Blood Well, it costs 5 Lindens to deposit, withdraw, or transfer.
If you deposit blood, it will add the amount of blood you deposited to the total amount you have deposited. It will also deduct that amount of blood from you in-world.
When you withdraw blood, the amount you withdraw will be added to your total blood in-world.
For transferring blood to another player, you will need to enter the key of the other player. Once you've clicked on the device to pay, the other player can access the blood by withdrawing it from the Blood Well.
Species Change

The Species Change Device allows you to change your species. If you're a vampire, you can switch to a lycan or witch, and vice versa. The cost to use the device is 2,500 Lindens. This price is set to discourage people from abusing the device and constantly changing species.
Reawakening Shrine

The Reawakening Shrine is an animated device that revives a player. To operate the Reawakening Shrine, two players are required. The player who needs to be revived sits on the device first, followed by the player who will perform the revival. Two essences will be taken from the reviving player. The revived player will be restored with 1.000 liters of blood.
Elixirs
-
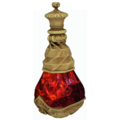 Revival Elixir (Red)
 -
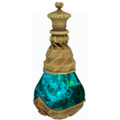 Breath of Vitality Elixir (Teal)


Elixirs are consumable items used to restore or revive your avatar in Descendants of Darkness. These interact with the human feeding system, not other players.
Types of Elixirs
- Revival Elixir (Red)
- Used to fully revive your avatar after death.
- Breath of Vitality Elixir (Teal)
- Used to restore humans that have been drained by feeding (when their blood has been taken).
Cost
Each elixir costs 250 Linden Dollars (L$).
They can be purchased at the Descendants of Darkness main land.
How to Use
- Purchase the elixir:
- Right-click the elixir vendor
- Select Pay and enter L$250
- Take the item:
- Right-click the elixir
- Select Take to move it into your inventory
- Use the elixir:
- Attach it to your avatar
- Click the elixir in your hand
- Select Open Bottle
- Confirm by selecting Yes
Once consumed, your avatar will be restored to full health.
Using Elixirs on Humans
Elixirs can also be used on humans.
- Once purchased, you can send the elixir to a human
- The human must attach the item
- They then use it the same way by opening and drinking the elixir
This allows you to restore humans that have been killed by feeding.
Essence Chest

The Essence Chest serves as a secure repository for your essence. Upon your demise, your essence would otherwise be lost, making it advisable to store it within the chest to prevent any loss. With the Essence Chest, you have the capability to deposit and withdraw essence at will. Moreover, you retain control over who can access your stored essence, with options to limit access to yourself, a select group, or open it to everyone. Additionally, you can track all transactions made with your essence through the transaction history feature. This provides transparency regarding who has withdrawn essence from your Chest. Finally, you have the ability to customize the appearance of your Essence Chest by selecting from various texture colors, including Gold, Blue, and Black.
Overseer

The Overseer Guide
The Overseer is a monitoring device that allows you to track yourself or another player. It can alert you when the monitored player is attacked, nearing starvation, or needs help while offline.
If the tracked player is attacked, the Overseer will send a notification in Nearby Chat and, if configured, to Discord through a webhook.
How Alerts Work
The server checks for attacks every 15 minutes on the hour. If an attack has occurred, the Overseer will send an alert within that 15-minute window.
Alerts may include:
- Attack notifications
- Near starvation warnings
- Discord webhook notifications, if added
What the Overseer Can Do
With the Overseer, you can:
- Monitor yourself or another player
- Receive attack alerts
- View attack logs for up to 3 days
- View death logs
- View kill logs
- Remotely donate blood to an offline player
- Add Discord webhook alerts
- Remove the tracked player and add a new one
How to Use the Overseer
- Rez the Overseer.
- Touch the Overseer to open the menu.
- Add yourself, or have the player you want to monitor touch it.
- Both players must be alive when adding a player.
- The tracked player may be resting, but they cannot be dead.
The Overseer hover text will change color depending on the tracked player’s health:
| Hover Text Color | Meaning |
|---|---|
| Green | Healthy |
| Yellow | Warning |
| Red | Danger |
Note: If the tracked player is dead, the menu options will not be available. The only available option will be to remove the player.
Overseer Menu Options
- Donate Blood
- View Attack Logs
- View Kill Logs
- View Death Logs
- Turn Off Attack Alert
- Turn Off Near Starvation Alert
- Set Starvation Alert
- Remove Player from Overseer
- Add Discord Webhook
1. Donate Blood
The Donate Blood option allows you to remotely feed the tracked player.
To donate blood:
- The tracked player must have been offline for at least 4 hours.
- You must accept the debit permissions popup.
- The cost is L$50 per 0.500 liters.
- Donations increase in 0.500 liter increments.
This is useful when a player cannot log in to feed themselves.
Important: Debit permissions allow the Overseer to charge your account for the blood donation.
2. View Attack Logs
The View Attack Logs option lets you review attacks against the tracked player.
You can view logs for:
- Today
- Yesterday
- The day before yesterday
Example Attack Log
╔═⊱⋅•∙•⋅⋅•⋅⋅•⋅⊱⋅⋅•⋅⋅•∙⋅∘☽★☾∘⋅∙•⋅⋅•⋅⋅⊰⋅•⋅⋅•⋅⋅•⋅⋅∙•⋅⊰
║ Date: Jun 11, 2026 10:56:35 AM
║ Attacker: Oreo Cream Rуσʂհℹη (oreocream.baby)
║ Victim: Eva Rуσʂհℹη (evakora)
║ Damage done: 0.000
║ Victim's Health: 4.700
║ Location: Uphill
║ Teleport to Uphill (128,128,25)
║ Page 2 of 2 of attack logs.
╚═⊱⋅•∙•⋅⋅•⋅⋅•⋅⊱⋅⋅•⋅⋅•∙⋅∘☽★☾∘⋅∙•⋅⋅•⋅⋅⊰⋅•⋅⋅•⋅⋅•⋅⋅∙•⋅⊰
Log Paging System
Attack logs, kill logs, and death logs all use a paging system.
Each page can display up to 4 logs. The Overseer can print up to 4 pages at a time. Once those pages are printed, you may be asked if you want to view more.
If you click More, the Overseer will print older pages.
Think of the logs like a book:
- The newest logs are on the highest page numbers.
- When the logs print in Nearby Chat, the newest entries appear at the top.
- Older entries continue below as more pages are printed.
3. View Kill Logs
The View Kill Logs option shows every recorded time the tracked player has killed another player.
Kill logs may include:
- Date and time
- Victim name
- Killer name
- Location
- Teleport location
- Total kill count
Example Kill Log
╔═⊱⋅•∙•⋅⋅•⋅⋅•⋅⊱⋅⋅•⋅⋅•∙⋅∘☽★☾∘⋅∙•⋅⋅•⋅⋅⊰⋅•⋅⋅•⋅⋅•⋅⋅∙•⋅⊰
║ Date: Apr 21, 2026 08:12:35 PM
║ Victim: Ninjie
║ Killed by Eva Rуσʂհℹη (evakora)
║ Location: Social Island 10
║ Teleport to Social Island 10 (128,128,25)
║ Page 1 of 2 of kill logs.
╚═⊱⋅•∙•⋅⋅•⋅⋅•⋅⊱⋅⋅•⋅⋅•∙⋅∘☽★☾∘⋅∙•⋅⋅•⋅⋅⊰⋅•⋅⋅•⋅⋅•⋅⋅∙•⊰
Example Total Kills Message
╔═⊱⋅•∙•⋅⋅•⋅⋅•⋅⊱⋅⋅•⋅⋅•∙⋅∘☽★☾∘⋅∙•⋅⋅•⋅⋅⊰⋅•⋅⋅•⋅⋅•⋅⋅∙•⋅⊰
║ Eva Rуσʂհℹη (evakora) has a total of 5 kills.
╚═⊱⋅•∙•⋅⋅•⋅⋅•⋅⊱⋅⋅•⋅⋅•∙⋅∘☽★☾∘⋅∙•⋅⋅•⋅⋅⊰⋅•⋅⋅•⋅⋅•⋅⋅∙•⋅⊰
4. View Death Logs
The View Death Logs option shows recorded deaths for the tracked player.
Death logs may include:
- Date and time
- Victim name
- Killer or cause of death
- Location
- Teleport location
- Total death count
Example Death Log
╔═⊱⋅•∙•⋅⋅•⋅⋅•⋅⊱⋅⋅•⋅⋅•∙⋅∘☽★☾∘⋅∙•⋅⋅•⋅⋅⊰⋅•⋅⋅•⋅⋅•⋅⋅∙•⋅⊰
║ Date: Apr 1, 2025 12:59:31 AM
║ Victim: Eva Rуσʂհℹη (evakora)
║ Killed by Kou Ayashi
║ Location: Kealani
║ Teleport to Kealani (128,128,25)
║ Page 3 of 4 of death logs.
╚═⊱⋅•∙•⋅⋅•⋅⋅•⋅⊱⋅⋅•⋅⋅•∙⋅∘☽★☾∘⋅∙•⋅⋅•⋅⋅⊰⋅•⋅⋅•⋅⋅•⋅⋅∙•⋅⊰
Example Total Deaths Message
╔═⊱⋅•∙•⋅⋅•⋅⋅•⋅⊱⋅⋅•⋅⋅•∙⋅∘☽★☾∘⋅∙•⋅⋅•⋅⋅⊰⋅•⋅⋅•⋅⋅•⋅⋅∙•⋅⊰
║ Eva Rуσʂհℹη (evakora) has died 13 times.
╚═⊱⋅•∙•⋅⋅•⋅⋅•⋅⊱⋅⋅•⋅⋅•∙⋅∘☽★☾∘⋅∙•⋅⋅•⋅⋅⊰⋅•⋅⋅•⋅⋅•⋅⋅∙•⋅⊰
5. Turn Off Attack Alert
This option turns off attack alerts for the tracked player.
When attack alerts are turned off:
- You will no longer receive Nearby Chat attack messages.
- Discord webhook attack alerts will also stop.
6. Turn Off Near Starvation Alert
This option turns off near starvation alerts.
When this is turned off, you will not receive a Nearby Chat message when the tracked player is close to dying from lack of feeding.
7. Set Starvation Alert
The Set Starvation Alert option allows you to choose when you want to be warned before the tracked player dies from lack of feeding.
You can choose to be alerted:
- 1 day before death
- 2 days before death
- 3 days before death
For example, if you select 1 day, you will receive a notification in Nearby Chat and Discord when the player is within one day of dying from starvation.
If the alert is set to 1 day and you receive the warning, the player will die at midnight if they are not fed.
8. Remove Player from Overseer
This option removes the currently tracked player from the Overseer.
After removing a player:
- You will no longer receive notifications about them.
- You may add a new player to the Overseer.
9. Add Discord Webhook
This option allows you to add a Discord Webhook URL to the Overseer.
Once added, the Overseer can send alerts to your chosen Discord channel when:
- The tracked player is attacked
- The tracked player is near death from starvation
Warning: Keep your Discord Webhook URL private. Anyone with the URL may be able to send messages to that Discord channel.
How to Add a Discord Webhook to the Overseer
Step 1: Create a Discord Webhook
- Open Discord.
- Go to the server where you want Overseer alerts to appear.
- Click the server name in the top left.
- Select Server Settings.
- Click Integrations in the sidebar.
- Under Webhooks, click Create Webhook.
- Choose the channel where alerts should be sent.
- Customize the webhook name and avatar if desired.
- Click Copy Webhook URL.
Step 2: Add the Webhook URL to the Overseer
- Touch the Overseer to open the menu.
- Select Add Discord Webhook.
- Paste the Discord Webhook URL.
- Confirm the change to save it.
Step 3: Test the Webhook
After adding the webhook, test it to make sure alerts are working.
You can test by:
- Simulating an attack on the tracked player
- Checking the selected Discord channel for the alert message
If the alert appears in Discord, the webhook is working correctly.
Quick Reference
| Option | What It Does |
|---|---|
| Donate Blood | Feeds an offline player using paid blood donation |
| View Attack Logs | Shows recent attacks against the tracked player |
| View Kill Logs | Shows kills made by the tracked player |
| View Death Logs | Shows deaths and causes of death |
| Turn Off Attack Alert | Stops attack alerts in Nearby Chat and Discord |
| Turn Off Near Starvation Alert | Stops starvation warning alerts |
| Set Starvation Alert | Sets a warning for 1, 2, or 3 days before starvation death |
| Remove Player from Overseer | Removes the tracked player |
| Add Discord Webhook | Sends Overseer alerts to Discord |
Trial of Shadows
Item: Trial of Shadows

Description: This ancient scroll allows you to challenge another player to a fight to the death! Do you have what it takes to accept the challenge?
How it Works
Challenge: Use the scroll to challenge another player. The challenger selects a fight duration and then selects a player to challenge.
Acceptance: If the player accepts, a countdown to the duel begins.
Combat Zone: Both players must remain in the region where the fight starts.
Consequences of Leaving:
- If a player leaves the region, logs out, or removes their HUD, they have 60 seconds to return.
- Failure to return in time results in being consumed by the darkness!
Victory Conditions: The fight continues until one player is defeated or the time is up for the fight.
Purchase Location
- The Realm, the system land
- Price: 100 Lindens
Note: This is a new feature and may have bugs. Please report any issues you encounter.
Dark blessings,
The Realm of Darkness Team